Qwen Image 3.0's image-to-image endpoint doesn't regenerate your subject from scratch — it edits the photo you feed it, while trying to hold the subject's shape, color, and proportions steady. That makes it useful for a very specific, very common job: turning one clean product shot into several scene variations without re-shooting or re-prompting the product itself every time.
We tested this directly with two subjects — a ceramic pour-over coffee dripper and a running sneaker — running each through a text-to-image starting shot, then two image-to-image edits apiece. Every prompt below is the exact, complete text we sent, and every image is the actual, unedited output.
How Qwen Image 3.0 Image-to-Image Actually Edits a Photo
The qwen-image-3.0/image-to-image endpoint takes a prompt plus 1-3 image_urls as reference photos, and an aspect ratio / resolution setting. There's no separate "strength" or "mask" parameter — the model relies entirely on the prompt to decide what changes and what doesn't.
In practice, that means the prompt needs to do two jobs at once:
- Describe the new scene, lighting, or addition you want.
- Explicitly restate what should stay untouched — shape, color, position, proportions.
Skip the second part and the model has more freedom to reinterpret the subject than you probably want. Every i2i prompt below spells out "preserve the [subject]'s exact shape, color, and proportions unchanged" (or equivalent) for that reason.
Recipe 1: A Clean Studio Base Shot (Text-to-Image)
Model: qwen-image-3.0/text-to-image · input: {"aspect_ratio": "1:1", "resolution": "1K"} · cost: $0.0358
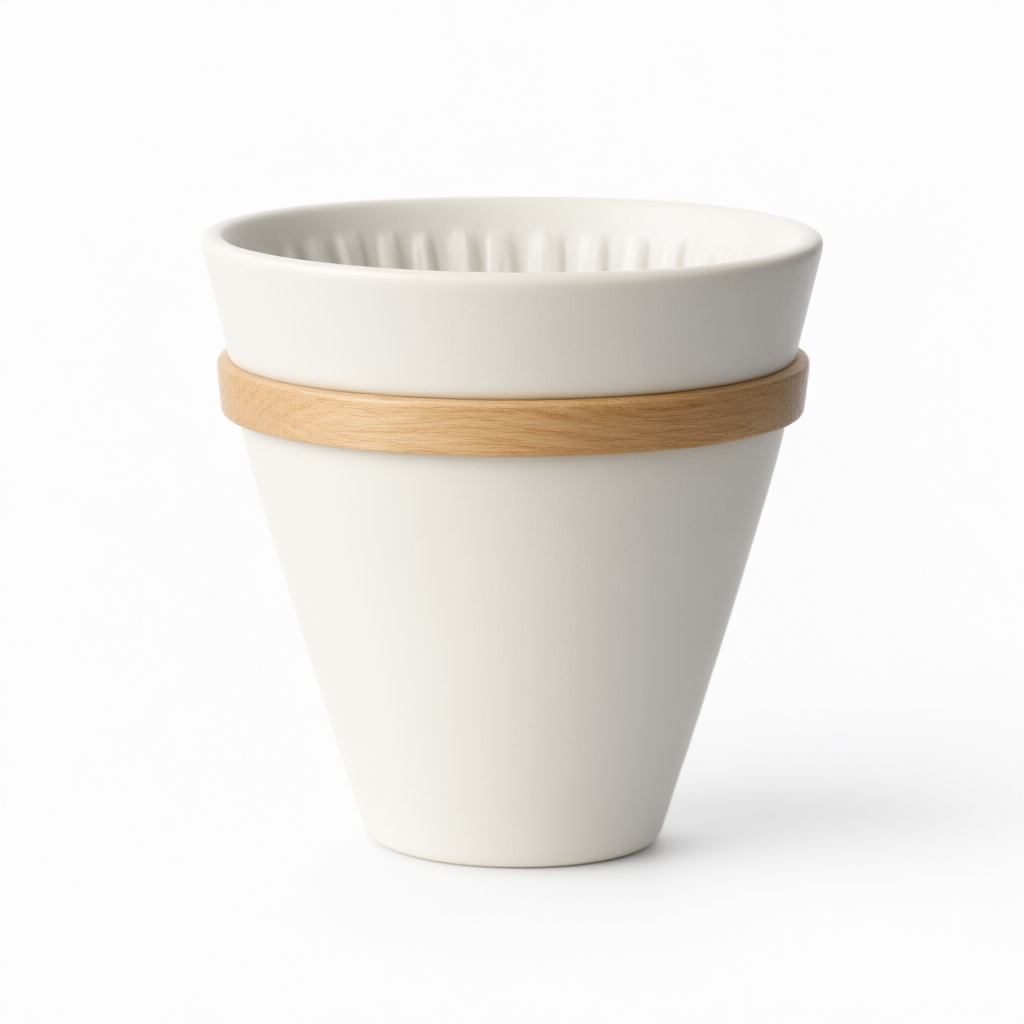
Prompt: "Professional product photography of a matte cream-white ceramic pour-over coffee dripper with a light wooden collar, positioned dead center on a seamless pure white studio background, soft diffused overhead lighting, no harsh shadows, straight-on angle, ultra-sharp focus, commercial catalog style."
This is the reference photo every later dripper edit builds on. Flat lighting and a plain background give the image-to-image step the cleanest possible starting point.
Recipe 2: Move It Into a Lifestyle Scene (Image-to-Image)
Model: qwen-image-3.0/image-to-image · input: {"image_urls": ["coffee-dripper-before.jpg"], "aspect_ratio": "1:1", "resolution": "1K"} · cost: $0.0398
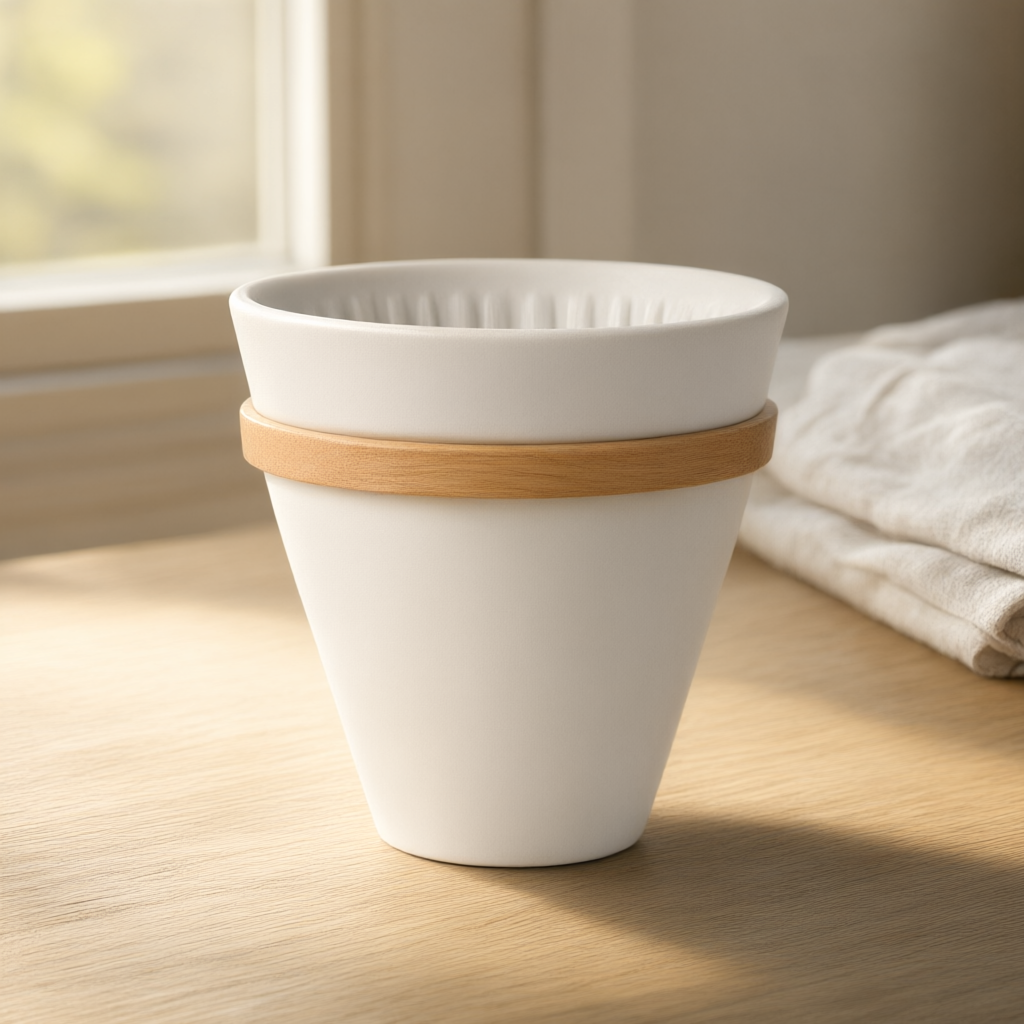
Prompt: "Move the ceramic pour-over coffee dripper onto a light oak wooden kitchen counter in front of a sunlit window, soft warm morning sunlight casting a gentle directional shadow to the right, a softly blurred folded linen towel in the background. Preserve the dripper's exact shape, color, and proportions unchanged."
The dripper's silhouette and glaze color carried over correctly — only the background, lighting, and shadow direction changed, exactly as scoped in the prompt.
Recipe 3: Add a Styled Prop Without Losing the Product (Image-to-Image)
Model: qwen-image-3.0/image-to-image · input: {"image_urls": ["coffee-dripper-before.jpg"], "aspect_ratio": "1:1", "resolution": "1K"} · cost: $0.0398
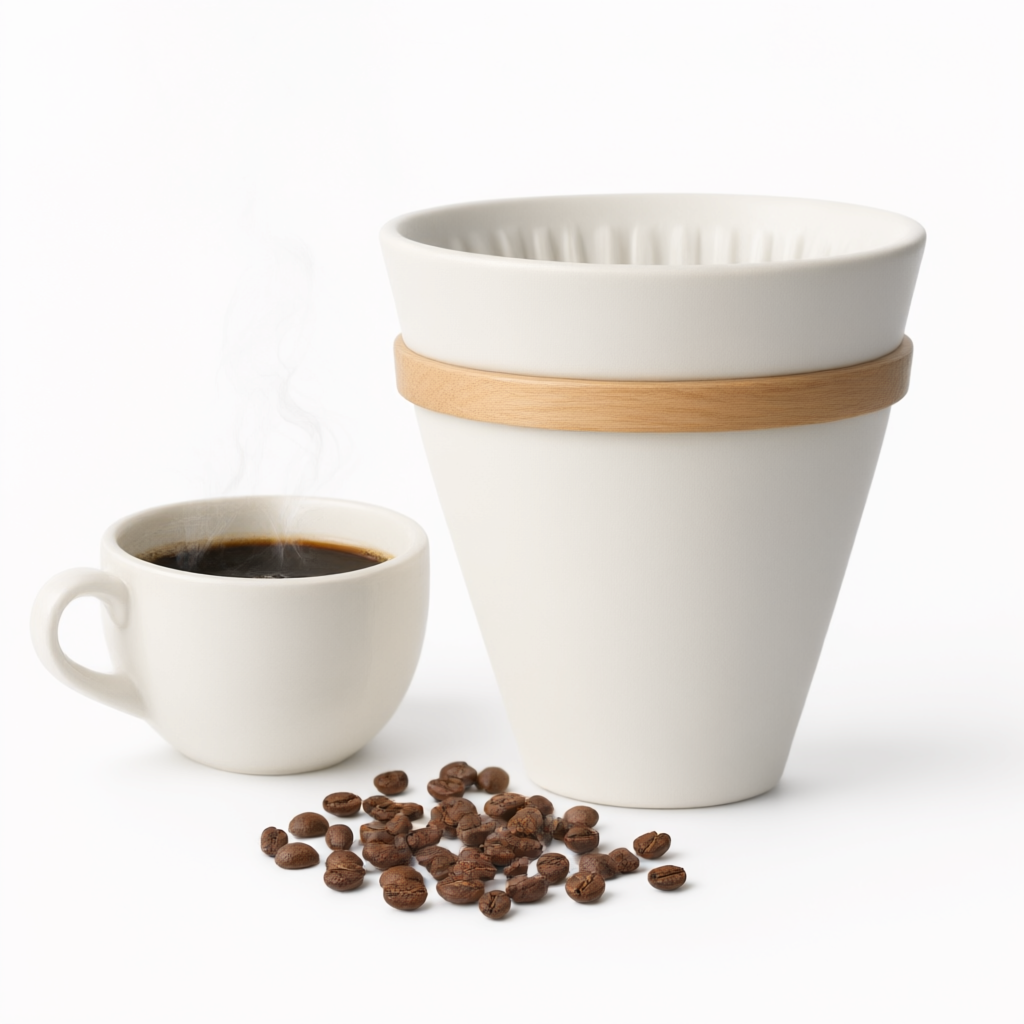
Prompt: "Keep the ceramic pour-over coffee dripper unchanged in shape, color, and position on the same pure white studio background and lighting. Add a white ceramic coffee cup filled with fresh brewed coffee and visible rising steam, placed just to the left of the dripper, plus a small scatter of whole roasted coffee beans on the surface in front of it."
This one reuses the same base photo as Recipe 2, but asks for an addition instead of a scene swap — the studio background and lighting stayed put, and the new cup and beans were composited in convincingly.
Recipe 4: A Second Clean Base Shot (Text-to-Image)
Model: qwen-image-3.0/text-to-image · input: {"aspect_ratio": "4:3", "resolution": "1K"} · cost: $0.0358
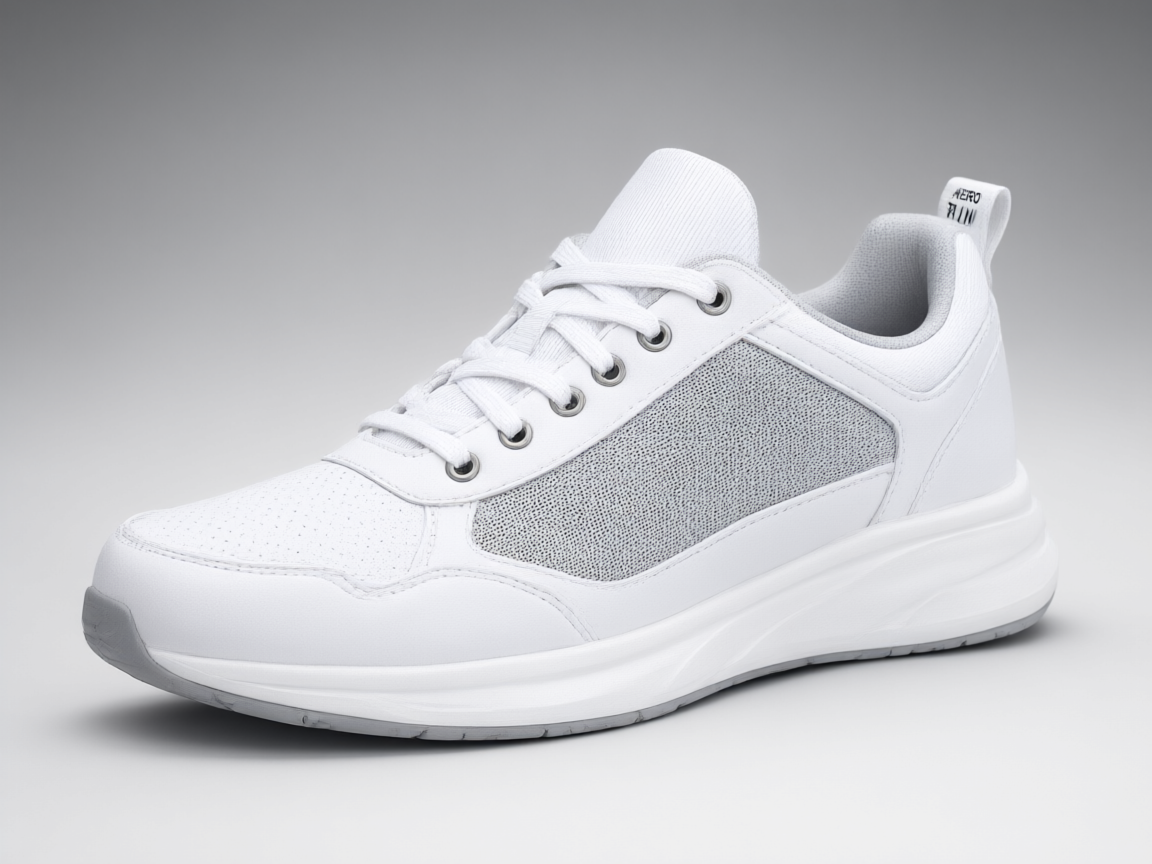
Prompt: "Professional product photography of a single white low-top running sneaker with grey mesh side panels, angled three-quarter view, resting on a seamless light grey studio background, soft even studio lighting, subtle contact shadow beneath the sole, sharp commercial catalog focus."
Same logic as Recipe 1, different aspect ratio — 4:3 gives a little more room around the shoe for the outdoor scene in Recipe 5.
Recipe 5: Golden-Hour Outdoor Scene (Image-to-Image)
Model: qwen-image-3.0/image-to-image · input: {"image_urls": ["sneaker-before.jpg"], "aspect_ratio": "4:3", "resolution": "1K"} · cost: $0.0398
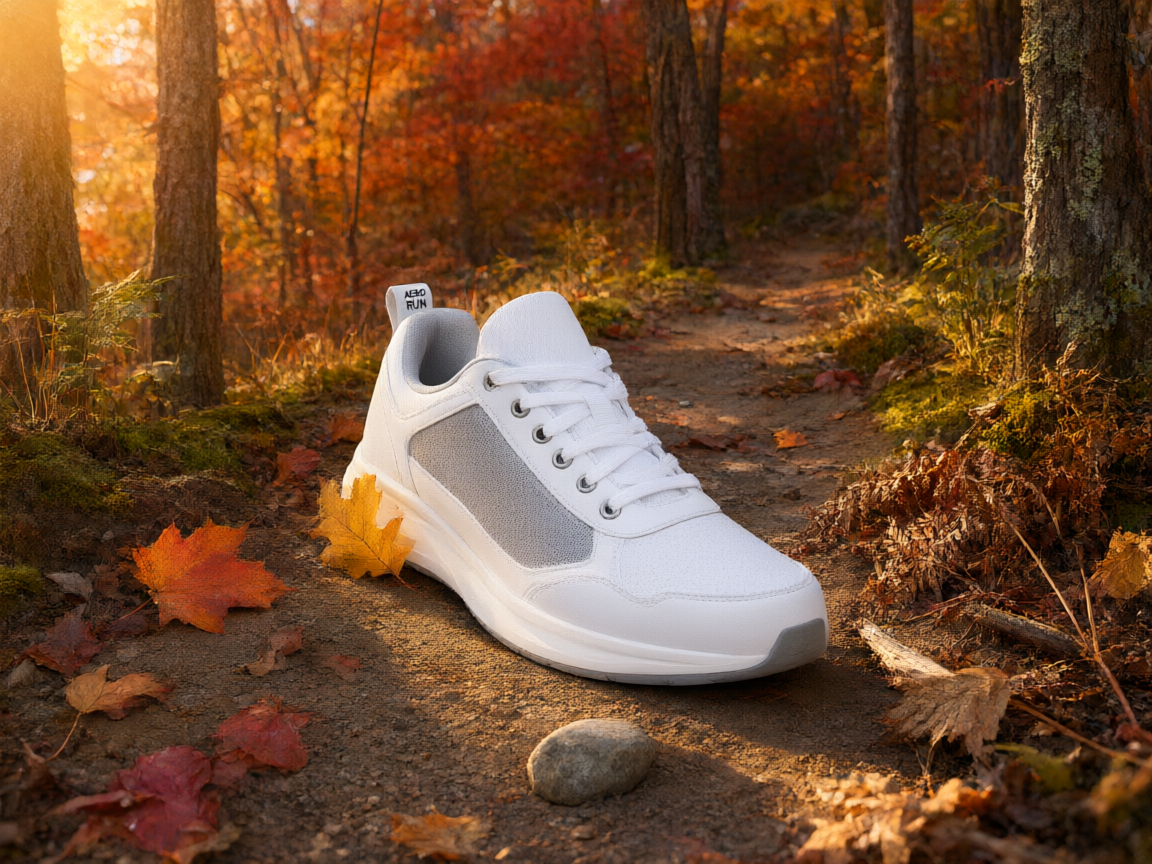
Prompt: "Move the white running sneaker onto a dirt trail path scattered with autumn leaves, golden hour sunlight raking in from the left creating long warm shadows and a soft lens-flare glow, blurred forest background. Preserve the sneaker's exact shape, color, and proportions unchanged."
The shoe's mesh panels and proportions held up under a completely different lighting setup — low, warm, directional light instead of flat studio light is a good stress test for whether the model is actually preserving geometry or just reprompting.
Recipe 6: Add Printed Text to a Tag (Image-to-Image)
Model: qwen-image-3.0/image-to-image · input: {"image_urls": ["sneaker-before.jpg"], "aspect_ratio": "4:3", "resolution": "1K"} · cost: $0.0398
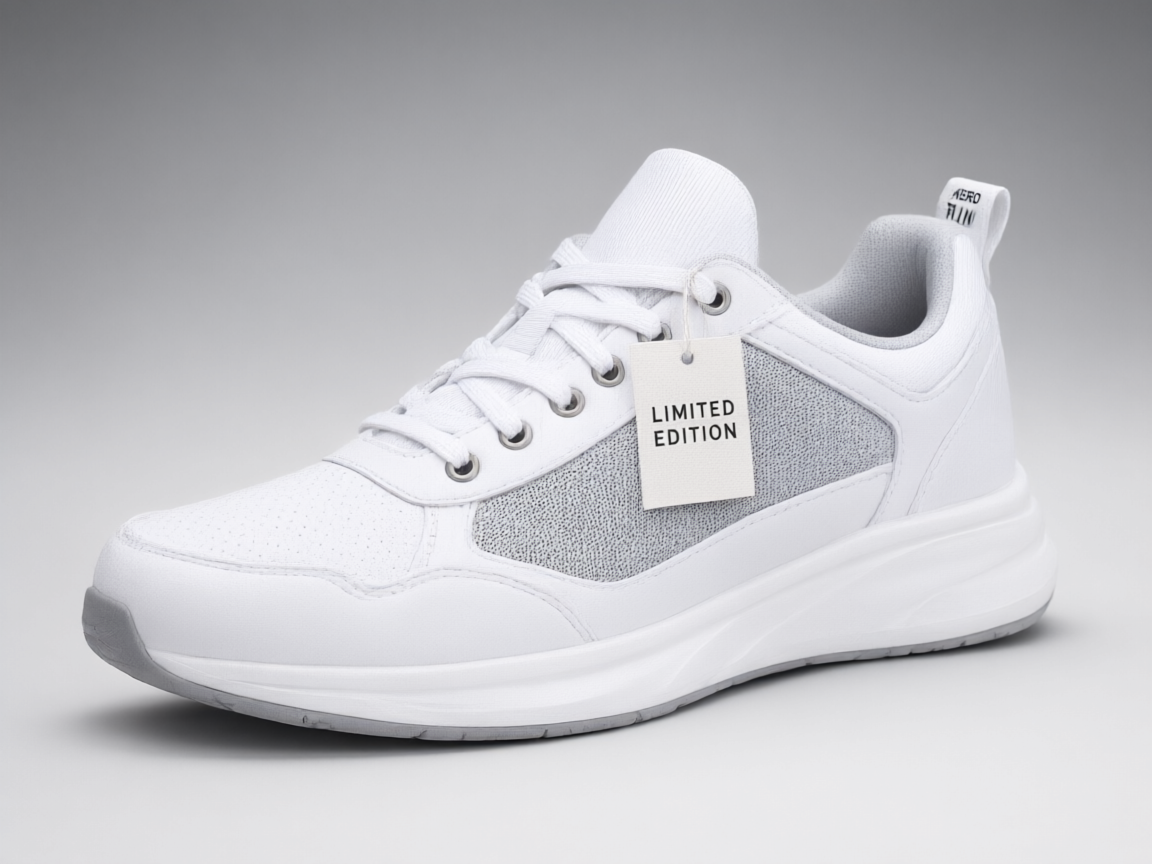
Prompt: "Keep the white running sneaker completely unchanged in shape, color, and position on the same light grey studio background and lighting. Attach a small rectangular white paper hangtag to the shoelace with the black printed text 'LIMITED EDITION' centered on it in a clean sans-serif font."
The tag text came out correctly spelled and centered on this run — but treat that as a good result, not a guarantee. Any AI-rendered text on a product photo, packaging mockup, or label needs a manual proofread before it goes live; a wrong letter or crooked baseline is the kind of thing that's easy to miss at a glance and embarrassing to publish.
What These 6 Generations Actually Cost
At 1K resolution, qwen-image-3.0/text-to-image is a flat $0.0358 per image. image-to-image adds a small reference-image fee on top of that same base — $0.004 per reference photo, for 1 to 3 references. Every recipe above used exactly one reference image, so each edit cost $0.0358 + $0.004 = $0.0398.
That means the full set — 2 base photos + 4 edits — cost $0.2308 total. For current per-image pricing across all models, check the HiAPI pricing page directly, since rates can change.
FAQ
What's the difference between qwen-image-3.0 text-to-image and image-to-image?
Text-to-image generates a new image from a prompt alone. Image-to-image takes 1-3 existing photos as image_urls plus a prompt, and edits from there — useful when you need to keep a specific product, character, or object consistent across multiple shots.
How much does a Qwen Image 3.0 image-to-image edit cost? $0.0358 base plus $0.004 per reference image (1-3 references allowed), at 1K resolution. One reference photo, like every recipe in this guide, costs $0.0398 per generation.
Can I use more than one reference image in a single edit?
Yes — up to 3 image_urls in one request. We used a single reference for every recipe here since one clean source photo was enough to hold the product steady across scene changes.
Does image-to-image change the product itself, or just the scene around it? That depends entirely on what the prompt asks for. If you want the product untouched, say so explicitly — "preserve the [subject]'s exact shape, color, and proportions unchanged" is the phrasing we used across all four edits above, and it held up.
What resolution should I use for e-commerce photos? 1K resolution was clean and sharp enough for every recipe in this test at a fraction of the cost of larger resolutions. Qwen Image 3.0 also supports 2K if you need larger source files for print or heavy cropping.
If you're building out a full product catalog rather than one-off shots, see how we handled batch e-commerce editing in Qwen Image 3.0 Pro for E-Commerce Product Images — or try the image-to-image endpoint yourself with your own reference photo.